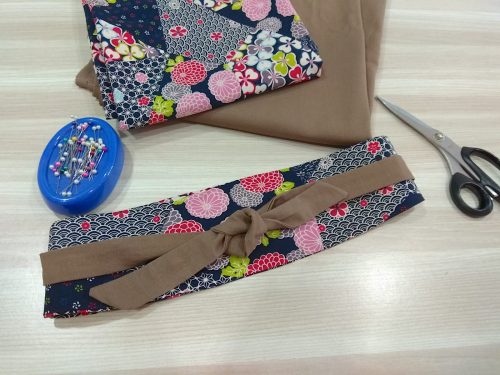
The Obi (Wonder) Belt!

The Obi belt is one of the hottest accessories to dominate the fashion world now as it is an easy way to up the style factor of any outfit and it also accentuates the body by creating a waistline! (Yes we need that!) Hence, the name, The Obi (Wonder) belt! [here’s a little nod to Star Wars fans too…if you get it, you get it.]
Furthermore, if you are looking for some belt-tightening (literally) ways to spice up your wardrobe, you can simply utilise fabric remnants for this project..and its really quite easy to sew too! Have fun with the tutorial below! You may get the Obi belt pattern here!
What you’ll need: printed Obi Belt pattern and main fabric (cotton/linen works well), contrast or plain fabric for the ties, medium-weight interfacing, iron, chopstick and of course, the sewing machine and the usual sewing tools.
Preparation:

- Cut 2 pieces of belt panel on fold. That means you’ll need to fold the fabric right sides together along the length-grain and pin the pattern along the fabric fold so that you will yield a mirror image after cutting. The fun part of this project is that you can choose to make this belt reversible and have a completely different fabric on the other side!
- Interface one belt panel using a medium weight interfacing. Choose whichever panel you like most! I had to iron on interfacing for both panels as the fabric I used is quite thin. Cut the interfacing such that it is about 1cm smaller all round, compared to the main fabric panel.

- Cut 2 PAIRS of ties (4 pieces in all). Sizes below: (If you like the ties to be slightly wider, you may change width to 6cm instead of 5cm)
- Small (waist <27″): 70cm by 5cm
- Medium (waist 28″-31″): 75cm by 5cm
- Large (waist >31″): 80cm by 5cm
- (optional) Create pointy ends for each pair of the ties by cutting away 3cm triangle. Refer to image below:

Here is what you should have before sewing:

Time to sew!
Use a 1cm seam allowance unless otherwise stated.
Step 1: Sew both pairs of ties by placing each pair right sides together. Sew all around except for one short-edge so that you can turn right side out later. Clip corners before turning right side out with the help of a chopstick and pin! Once you have turned them right side out, press with an iron.
Step 2: Mark out the mid-points on the raw edge of the ties and on both sides of the belt panels. (This line is indicated in the digital pattern)

Step 3: Pin the tie to each side of the belt panel* by matching the mid-points along the raw edges. Baste the ties using a longer stitch length (e.g 4mm)

*Placement of ties: the pointy part of the ties should point outwards. Refer to image below: (I had to fold the ties as they were too long to be captured in this photo)

Step 4: Fold and tuck the ties neatly onto the belt panel first, before placing the other belt panel over it. Right sides facing. This way, the ties will not obstruct you when sewing.

Step 5: Pin and sew all around, but leave a 8cm gap on one side at the middle of belt panel. This gap is for turning the belt right side out later.

Step 6: Trim corners to reduce bulk when turning right sides out. Turn right side out and press with iron.

Final step: Slip-stitch to close up the gap! Here’s a youtube video on how to slip-stitch in case you don’t know!

Voila! And we are done with our Obi (Wonder) belt! Enjoy!

